> For the complete documentation index, see [llms.txt](https://docs.modoocheck.com/llms.txt). Markdown versions of documentation pages are available by appending `.md` to page URLs; this page is available as [Markdown](https://docs.modoocheck.com/quick-guide/advanced-features/excel-management/upload.md).
# 엑셀 업로드
엑셀로 원생을 간편하게 업로드할 수 있도록 안내드릴게요.
## 1. 스프레드시트 모드 클릭
PC에서 관리모드 실행 후 원생탭을 선택하고 스프레드시트 모드를 눌러 주세요.
{% hint style="info" %}
앱에서 스프레드시트 모드 버튼이 보이지 않아요!
스프레드시트 모드는 PC에서만 제공되는 기능으로 앱에서는 버튼이 보이지 않습니다.
{% endhint %}
## 2. 업로드 양식 다운로드 클릭
상단의 업로드 양식 다운로드를 눌러 주세요.
## 3. 학생 정보 입력
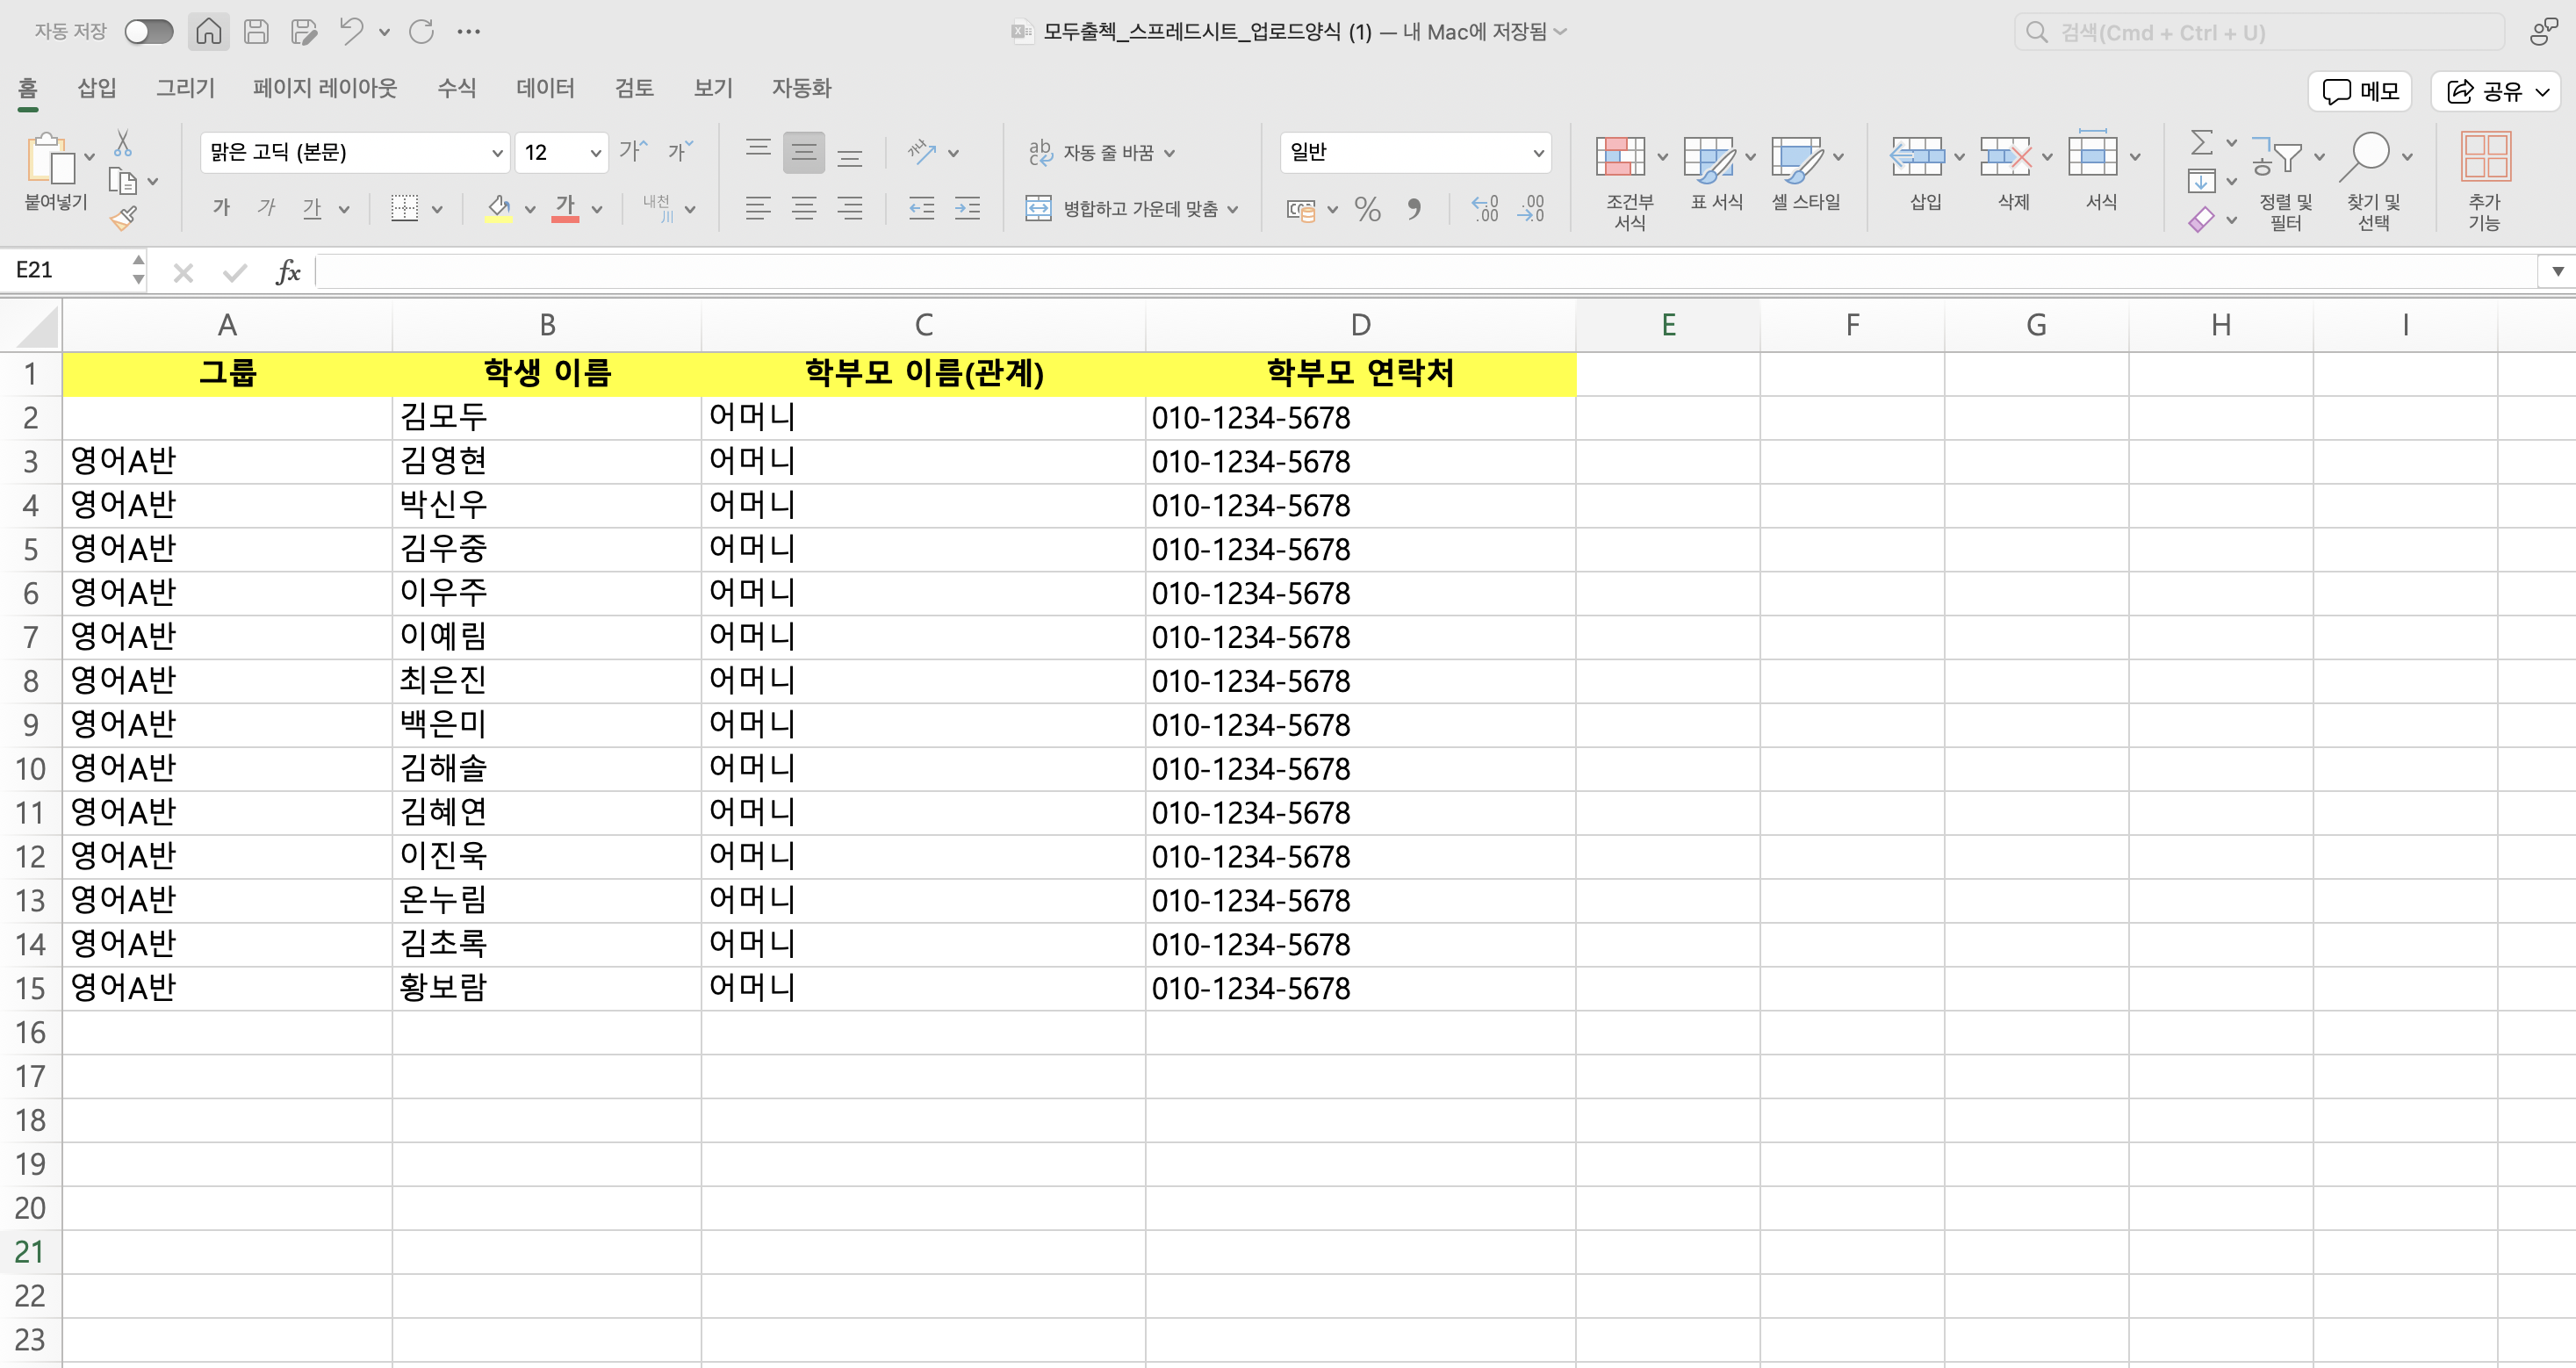
다운로드된 엑셀 파일에 등록하고 싶은 학생의 정보를 입력하고 저장하세요.
## 4. 엑셀 파일 올리기 클릭
상단의 업로드 엑셀 파일 올리기를 눌러 주세요.
## 5. 엑셀 파일 업로드
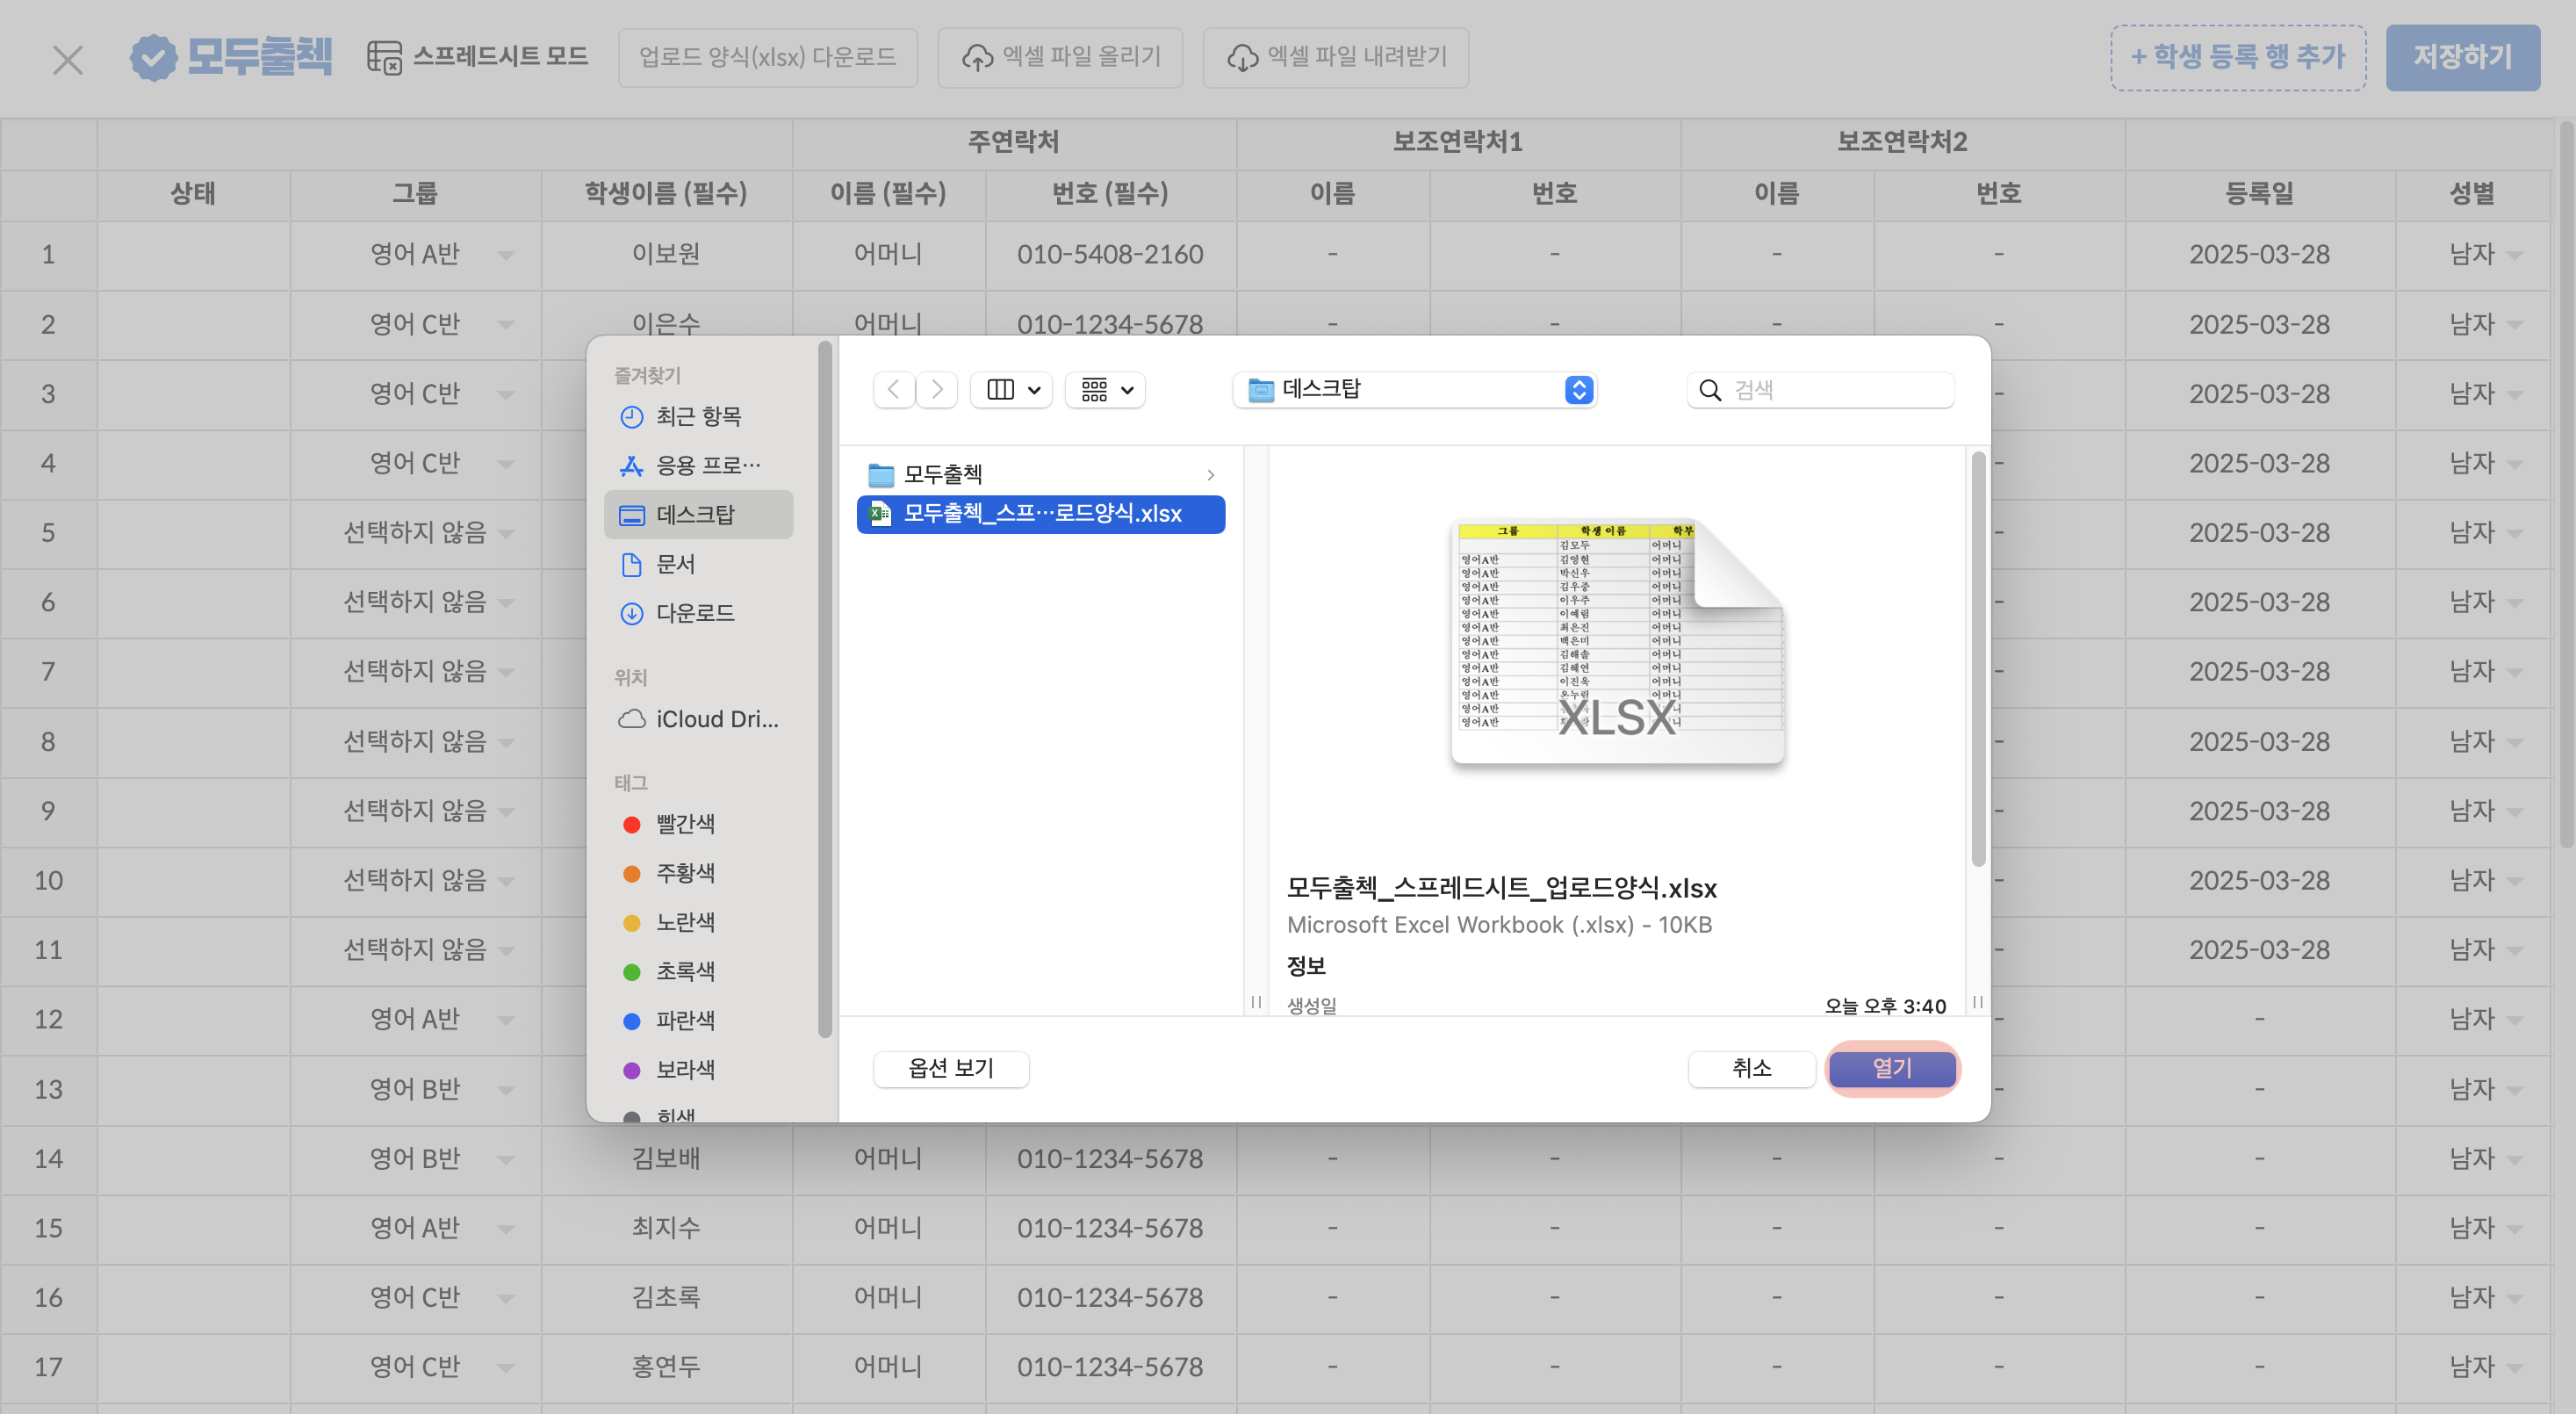
작성한 엑셀파일을 선택하고 열기버튼을 눌러 주세요.
## 6. 업로드 완료
파일에 입력한 학생 정보가 업로드됩니다. 업로드한 학생 정보를 간편하게 수정하고 저장해 보세요!
%20%EB%B3%B5%EC%82%AC%EB%B3%B8.png?alt=media)
%20%EB%B3%B5%EC%82%AC%EB%B3%B8.png?alt=media)
%20%EB%B3%B5%EC%82%AC%EB%B3%B8%202.png?alt=media)
.png?alt=media)